In this blog series, I'll explan how I used the Internet of Things (IoT) to enable my gate, garage door and garden irrigation system using Azure IoT Hub, ESP32, IFTTT, .Net Core and much more.
This blog was originally posted on 3 November 2020 in a series of DIY IoT blogs by Trent Steenholdt, Managing Consultant at Telstra Purple.
Custom IoT solutions are relatively new to me. Of course, IoT is everywhere these days, but I’ve never worked with my own micro-controllers and utilised services and protocols like Azure IoT Hub and MQTT. This blog series will not be about best practices on how to do this, but more about my experience and learnings.
An introduction to the project

When COVID-19 lockdowns started in Australia around mid-March 2020, I like many others, ended up with a bunch of free time. I used it to embark on some big DIY projects, including putting up a driveway gate and wiring a motor to it, so that it opens like a garage door with a remote. The gate was fantastic, but now I was stuck with two remotes – one for the gate that used a unique frequency, and one for the garage that used a rolling code. At this point, I was wondering what I could do to fix this as there is no universal remote out there to do it all. Trust me, I looked!
A few ideas came to mind, like wiring up the normally open (NO) loops of both gate and garage together. This, however, created another issue: if I just wanted to open one, I couldn’t. At this point, I knew my only option was to design something entirely custom, and so here we are.
Building a custom solution
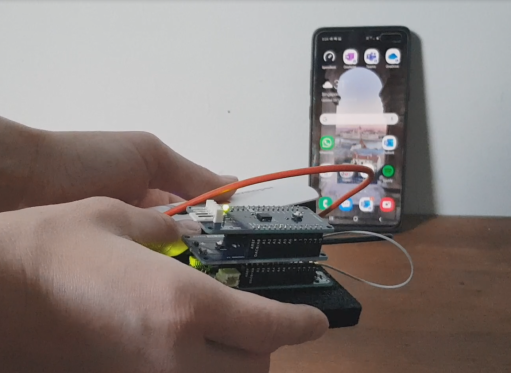
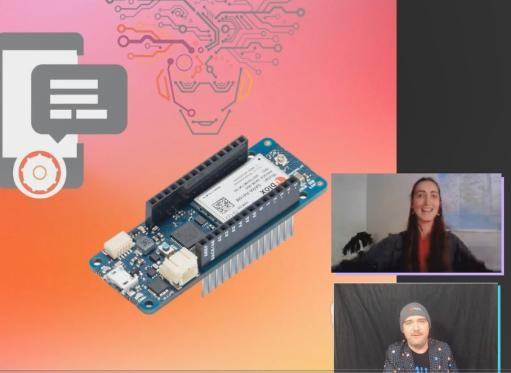
First, we need some hardware to run this custom solution. Something like an Arduino, Rasberry Pi, ESP8266 or an ESP32. I wanted something cheap that did all the things. This where I made my first mistake: buying a custom ESP32 PCB from eBay. Within five minutes of having the PCB, I had killed the ESP32 chip.
If you’re just starting with IoT, my recommendation would be to buy a hardware option from a known manufacturer with lots of documentation. Custom PCBs, while they might sound like a great idea (“Hey, this does everything, I can’t go wrong”), are very lacking in the detail. My mistake by sending 5 volts somewhere I shouldn’t have on the PCB was ultimately because the PCB schematic was wrong. Turns out my iteration of the PCB was different from the documentation they sent me.
What I ended up doing is buying my second ESP32 development board from a local store, one that had integrated USB and a separate 4-ch relay controller. Not only did I have documentation of the pin layouts, but the people at my local store were super helpful about how I should tackle the project.

So with the hardware, I started putting it all together. Thankfully, following the tip from the guys at my local store and some great videos on YouTube, I was able to get started really quickly. I did spend some time, however, getting my IDE set up correctly, so I’d encourage you, learning from my second mistake, to start very small with an example sketch in say Arduino IDE or VSCode, and build on from there.
With everything right to push code from my local PC, I wired up the first relay to the appropriate GPIO. I had compiled the C++ sketch/code to make use of all four relays with a simple web server front-end. Sure, I only have the gate and garage to control, but why not think big!

I was pretty excited at this point. I could control my gate just by going to an IP address on the network and presto, no more need for two remotes!
The real-world test
Having this all set up, I learnt something quickly: when I'm not on the network, a web server is no good to me. A bit more back story here – the gate I’ve installed blocks any access to the front of the house and subsequently, the meter boxes. This design decision became a sticking point when the meter reader rang my Ring doorbell on the gate, and I couldn’t let him in because the ESP32 web server was inaccessible. At that point, I knew I had to connect my ESP32 to something like IFTTT so I could control it remotely.
Now, this is where Azure IoT Hub and the power of MQTT come in. Essentially, I needed my ESP32 to be subscribing (listening) to Azure IoT Hub for it to do a thing when I triggered a change.

The way I describe MQTT subscribing is that the ESP32, the nagging child, is continually nagging mum, the Azure IoT Hub for the chocolate bar. When Azure IoT Hub finally says yes after persistently saying no – as in changes from 0 to 1 – little child ESP32 gets their chocolate (opens the gate).
Setting up the subscribing and publishing of values was relatively straight forward. In my C++ sketch. All I needed to do was connect to the Azure IoT Hub and set up a function in the loop() that checked if the value had changed, do the function to open the gate and then, have another function then publish back a 0 again.
| void publishAzuredata(char* event, unsigned int value){ | |
| client.publish(event, value); | |
| } | |
| void subscibeAzuredata(char* event){ | |
| client.subscribe(iothub_subscribe_endpoint); | |
| } | |
| void reconnect() { | |
| while (!client.connected()) { | |
| Serial.print("Attempting MQTT connection..."); | |
| if (client.connect(iothub_deviceid, iothub_user, iothub_sas_token)) { | |
| Serial.println("connected"); | |
| } else { | |
| Serial.print("failed, rc="); | |
| Serial.print(client.state()); | |
| Serial.println("try again in 5 seconds"); | |
| // Wait 5 seconds before retrying | |
| delay(5000); | |
| } | |
| } | |
| } | |
| void callback(char* topic, byte* payload, unsigned int length) { | |
| if (String(topic) == "device/deviceID/gate") { | |
| if (value == "1") { | |
| digitalWrite(gatePin, HIGH); | |
| delay(2000); | |
| client.publish(topic, 0); | |
| digitalWrite(gatePin, LOW); | |
| } | |
| else if (value == "0") { | |
| //do nothing really | |
| //digitalWrite(gatePin, LOW); | |
| } | |
| } | |
| } | |
| void setup(){ | |
| client.setServer(mqttServer, mqttPort); | |
| client.setCallback(callback); | |
| subscibeAzuredata("device/deviceID/gate"); | |
| subscibeAzuredata("device/deviceID/garage"); | |
| connect_mqtt(); | |
| } | |
| void loop(){ | |
| if (!client.connected()) { | |
| reconnect(); | |
| } | |
| client.loop(); | |
| } |
To interface with Azure IoT Hub itself and change the value of 0 to 1, I had a few options like a Logic App or Function App in Azure. However, to keep it simple, I decided to stick with what I know and write a PowerShell script hosted in an Automation Account Runbook that I could call with a WebHook. That way I could do an HTTP post with a JSON body that could open the gate, or garage or even both at the same time.
Now that I have the WebHook, I could theoretically call it from anywhere in the world, but I wanted to have a nice way of doing it besides using Postman. Here is where I leveraged IFTTT applets, one for my phone (push notification with IFTTT app when Ring Doorbell rung), and another for Google Assistant.

The result is the ability to control my gate and garage from anywhere in the world, securely and quickly.


Presto, open sesame!
In the next part of this series, I’ll dive into how I integrated my ESP32 with my Bluetooth enabled garden irrigation system to trigger garden watering from anywhere, using data from the Bureau of Meteorology.
Further reading
Check out the original blog and other IoT Home projects with the Telstra Purple team:
https://purple.telstra.com.au/blog/home-iot-project-azure-part1
https://purple.telstra.com.au/blog/archive?category=INTERNET%20OF%20THINGS